Carpet Cleaning

DIY Carpet Steam Cleaning vs. Professional Services

Regular carpet maintenance not only preserves your flooring’s beauty but also promotes a healthier living environment. Deep cleaning, especially steam carpet cleaning, extends the life of your carpets by eliminating embedded dirt, bacteria, and allergens. But should you roll up your sleeves for a DIY approach or enlist professional help? Let’s explore both options to help you decide.

What Is Carpet Steam Cleaning and Why Is It Important?

Carpet steam cleaning—often called hot-water extraction—uses heated water combined with powerful suction to remove deep-seated grime, stains, and bacteria. Unlike surface cleaning, this method penetrates carpet fibers to refresh and sanitize without leaving behind harsh chemical residues. It’s also a go-to solution for tackling pet odors and stubborn stains that typical vacuuming can’t resolve.

Why Steam Cleaning Your Carpets Matters

Here’s why steam cleaning is a game-changer:

  • Eliminates allergens and bacteria: Crucial for households with pets, kids, or allergy sufferers.
  • Prolongs carpet life: Helps prevent fiber wear and tear, reducing the need for costly replacements.
  • Removes deep stains and odors: The steam’s heat breaks down tough grime trapped beneath the surface.
  • Eco-conscious choice: Utilizes minimal chemicals, making it safer for your family and the environment.

DIY Carpet Steam Cleaning: Pros and Cons

Many homeowners consider renting or purchasing a carpet steamer. Let’s weigh the benefits and drawbacks.

Benefits of DIY Carpet Steam Cleaning

  • Cost savings: Renting a machine is generally less expensive than hiring a service.
  • Flexible timing: Clean at your convenience.
  • Quick fixes: Easily address accidental spills and stains as they occur.

Downsides of DIY Steam Cleaning

  • Weaker equipment: Household machines lack the heat and suction power of professional-grade units.
  • Longer drying times: Excess moisture may linger, increasing the risk of mold.
  • Risk of damage: Over-saturating or using too much detergent can harm carpet fibers and padding.
  • Labor-intensive: Moving furniture and handling the equipment can be exhausting.

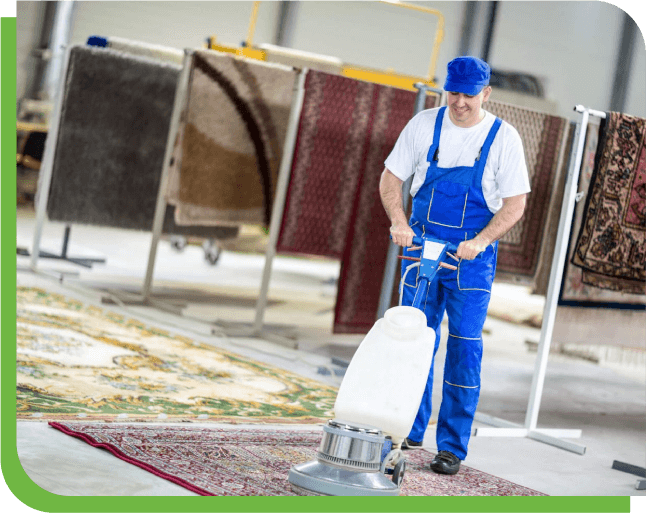
Professional Carpet Steam Cleaning: Is It Worth It?

Investing in professional carpet cleaning often delivers better, longer-lasting results.

Advantages of Hiring Experts

  • Superior equipment: Industrial machines clean deeper and dry carpets faster.
  • Expertise: Trained technicians recognize carpet types and tailor cleaning methods accordingly.
  • Convenience: No heavy lifting or technical know-how required.
  • Lasting cleanliness: Deep cleaning promotes a healthier, fresher home environment.

Potential Drawbacks

  • Higher upfront cost: Especially for larger homes or extensive services.
  • Scheduling required: Must book in advance and coordinate appointments.
  • Possible extra charges: Some companies charge more for stain treatments or high-traffic areas.

For trusted, eco-friendly results, consider green carpet’s cleaning—a leader in the field of professional carpet cleaning.

DIY vs. Professional Steam Cleaning: At a Glance

FeatureDIY CleaningProfessional Cleaning
CostLower initial costHigher, but better value over time
PowerBasic consumer-gradeIndustrial strength
Drying Time12–24 hours4–6 hours
EffortLabor-intensiveMinimal for homeowners
EffectivenessModerateDeep, thorough clean

How Often Should You Steam Clean?

Recommended frequencies vary by household:

  • Low-traffic homes: Every 12–18 months
  • Homes with kids/pets: Every 6–12 months
  • Allergy sufferers: Every 3–6 months
  • Commercial spaces: Every 3–6 months

DIY Carpet Cleaning Tips for Success

If you opt to handle cleaning yourself, keep these pro tips in mind:

  • Vacuum beforehand: Remove surface debris to maximize steam cleaning results.
  • Use appropriate solutions: Choose detergents suitable for your carpet type.
  • Avoid over-wetting: Excess moisture can cause mold and mildew.
  • Ensure thorough drying: Open windows or use fans to expedite the process.
  • Test cleaners in hidden spots: Prevent accidental discoloration or damage.

Frequently Asked Questions

Is steam cleaning safe for all carpets? Yes, but delicate fabrics like wool may need special care. Always follow the manufacturer’s advice.

How long until carpets dry? Professionally cleaned carpets typically dry in 4–6 hours, while DIY jobs may take up to 24 hours.

Can I walk on damp carpets? It’s best to wait until fully dry, but clean socks or shoe covers can protect the fibers if necessary.

Does steam cleaning remove pet odors? Yes. For severe cases, additional enzyme treatments may be necessary.

Is steam cleaning superior to shampooing? Absolutely. Steam cleaning uses less detergent, leaves no sticky residue, and provides a deeper clean.

Conclusion: Which Path Should You Choose?

DIY steam cleaning works well for routine upkeep and spot treatments. However, for comprehensive stain removal, odor elimination, and a healthier indoor space, hiring a same day carpet cleaning professional is the better choice.

Periodic professional cleanings will not only keep your carpets looking their best but also safeguard your family’s health and prolong your carpet’s lifespan. To attract more clients, many carpet cleaning businesses now leverage specialized online marketing solutions.

Stain Removal Mastery: Seasonal Solutions for Spotless Living

Stain Removal Mastery: Seasonal Solutions for Spotless Living

Life’s little mishaps are unavoidable—from a red wine mishap during a cozy gathering to muddy footprints after an adventurous hike. Stains can strike any time of year, but with swift action and the right techniques, your home can stay pristine. Acting quickly is the golden rule to prevent stubborn stains from becoming permanent.

In this expert guide, you’ll uncover innovative stain removal techniques tailored for every season and surface—whether it’s carpet, upholstery, clothing, or hard floors.

Everyday Stain Battles: Winning Strategies

Wax Woes: Banishing Hardened Spills

When wax finds its way onto your carpet or sofa, don’t panic. Professional carpet cleaning methods offer quick solutions:

For Carpets and Upholstery:

  • Freeze the Wax: Apply an ice pack to harden the wax.
  • Lift Carefully: Gently scrape with a dull knife or credit card.
  • Heat and Absorb: Place a paper towel over the residue and press with a warm iron to draw out the wax.
  • Clean the Spot: Use a mild dish soap solution to remove any lingering marks.

For Hard Surfaces:

  • Warm It Up: Use a hairdryer to soften the wax.
  • Wipe Clean: Remove residue with rubbing alcohol and a microfiber cloth.

Chocolate Catastrophes: Sweet but Stubborn

Chocolate spills can quickly turn into a sticky mess. Tackle them like a pro:

For Fabrics:

  • Harden the Spill: Chill with an ice pack.
  • Scrape Off Excess: Gently lift with a dull tool.
  • Pre-Treat: Apply liquid dish soap and allow it to sit for five minutes.
  • Wash: Use the warmest water safe for the material.

For Upholstery and Carpets:

  • Blot First: Use a dish soap and water solution.
  • Rinse and Dry: Remove any soap residue with a damp cloth and blot dry.

Handling Liquid Stains Like a Pro

Red Wine: Swift Solutions for a Common Culprit

Speed is your ally against red wine stains:

  • Blot Immediately: Absorb as much liquid as possible without rubbing.
  • Salt or Baking Soda: Sprinkle generously to soak up remaining wine.
  • Clean Gently: Apply a dish soap and hydrogen peroxide mix and blot softly.
  • Rinse and Dry: For clothing, launder promptly; for carpets, rinse and blot.

Coffee Spills: Morning Mishaps Made Manageable

For Fabrics:

  • Soak: Use a mix of white vinegar, dish soap, and warm water for 15 minutes.
  • Rinse and Launder: Finish with a cold water rinse and normal wash.

For Carpets and Furniture:

  • Act Fast: Blot up liquid with a dry towel.
  • Clean: Mix hydrogen peroxide with warm water and blot the stain.
  • Final Touch: Rinse with a damp cloth and pat dry.

Seasonal Offenders: Mud, Sap, and More

Mud Marks: Keeping Nature Outside

For Carpets and Rugs:

  • Dry Completely: Never clean wet mud.
  • Vacuum Thoroughly: Remove loose dirt.
  • Spot Clean: Use a dish soap and warm water solution.

For Clothing:

  • Shake Off Dirt: Pre-treat with stain remover before washing.

Tree Sap: Tackling Sticky Situations

For Clothing:

  • Pre-Treat: Apply laundry detergent directly to the stain.

For Carpets and Upholstery:

  • Use Rubbing Alcohol: Apply sparingly to dissolve the sap.

Wash or Blot Dry depending on the material.

Fast Fixes for Common Household Stains

  • Grease and Oil: Sprinkle baking soda or cornstarch to absorb oils before washing.
  • Ink: Dab rubbing alcohol or hairspray before laundering.
  • Soot and Fireplace Ash: Cover with baking soda, let sit, then vacuum thoroughly.

Frequently Asked Questions

1. How can I remove old, set-in stains? Soak the stain with a paste of baking soda and vinegar or use a strong stain remover before laundering.

2. What prevents stains from becoming permanent? Blot immediately, avoid hot water for fresh stains, and treat them promptly.

3. Are natural stain removers effective? Absolutely. Lemon juice, vinegar, hydrogen peroxide, and baking soda are excellent, eco-friendly options.

4. Is bleach safe for all stains? Only use bleach on white fabrics and always test a small hidden area first.

5. What’s the most versatile homemade stain remover? A mixture of dish soap, hydrogen peroxide, and baking soda is effective on a wide variety of stains.

Keep Your Home Spotless Year-Round

By mastering these stain removal strategies, you can confidently manage everything from chocolate smudges to muddy carpets. Many homeowners now prefer eco-friendly cleaning solutions over harsh chemicals for a healthier home environment. For particularly challenging spills or for a deep refresh, consider scheduling a professional carpet cleaning or same day carpet cleaning service to restore your home’s fresh, clean look—any season of the year!

To grow your carpet cleaning business, staying updated with modern marketing strategies is just as important as offering quality services.

Water Damage Restoration Strategies to Avoid Mold Problems

Imagine coming home after a long day and stepping into a space that feels damp and smells musty. You suddenly realize that your basement has flooded, and panic sets in. This situation might sound familiar to many homeowners, and unfortunately, it’s all too common. Water damage can lead to serious structural issues in your home—and even worse, it can create the perfect breeding ground for mold. This blog will explore effective water damage restoration strategies to avoid mold problems, ensuring your home stays safe and healthy.

Understanding the Impact of Water Damage

When water invades your home, it can come from various sources, such as heavy rain, burst pipes, or even accidents like overflowing sinks. Once water seeps into materials like wood, drywall, or carpets, the damage can escalate quickly. If not addressed promptly, it can lead to mold growth within just 24-48 hours. This is where effective water damage restoration strategies come into play.

The Science Behind Mold Growth

Before diving into the strategies, let’s understand why mold thrives after water damage. Mold spores are present everywhere, but they need certain conditions to flourish: moisture, warmth, and organic material (like wood or fabric). When your home experiences water damage, these conditions can easily be met. Knowing this, it’s crucial to act fast and implement proper restoration strategies to mitigate these risks.

Water Damage Restoration Strategies

  1. Act Quickly: Time is of the essence when dealing with water damage. If your home has been flooded or has experienced a leak, you’ll want to start investigating the situation within hours. The longer you wait, the higher your risk for mold growth.
  2. Remove standing water: Use a wet vacuum or a pump to eliminate any standing water. If you’re dealing with a significant flood, it might be wise to call in professionals who can handle the situation more effectively.
  3. Dry the area thoroughly: Once the water is removed, it’s time to dry out the affected areas. Open windows and doors to allow air circulation, use fans or dehumidifiers, and if possible, remove soaked carpets or furniture. The goal is to lower the humidity level and ensure that everything dries completely.
  4. Inspect for damage: Take a close look at structural elements such as beams and drywall. If they’ve been severely compromised by water, you may need to replace them entirely. Be vigilant and check for hidden pockets of moisture that can lead to mold growth.
  5. Disinfect and clean: After drying and inspecting the area, disinfect surfaces to kill mold spores that may be present. Use a mixture of water and detergent or a commercial cleaner. For more severe cases, especially where toxic mold is a concern, consider professional cleaning services.
  6. Seal and repair: After ensuring that all areas are clean and dry, repair any damage. Apply paint, sealants, or insulation as needed. By sealing your home properly, you’ll help prevent future water intrusion.

Creating a Mold Prevention Plan

Even after following water damage restoration strategies, it’s wise to prepare for the future. Here are some practical tips to help you avoid mold problems in the long run:

  • Regularly inspect your home for leaks or signs of moisture. Early detection can save you time and money.
  • Maintain gutters and downspouts to direct water away from your home’s foundation.
  • Ensure proper ventilation in areas like bathrooms and kitchens, where moisture levels tend to be higher. Exhaust fans are a great addition!
  • Use mold inhibitors in paint and sealants to reduce the risk of mold growth.
  • Invest in a dehumidifier if you live in a humid climate. This can help maintain optimal humidity levels in your home.

Real-World Example: A Family’s Journey

Let’s take a look at a real-world example to illustrate these strategies in action. The Garcia family noticed a water leak in their attic after a heavy rainstorm. Instead of waiting, they acted promptly. They removed the wet insulation and called a professional to help with water extraction. Using fans and dehumidifiers, they ensured everything dried within a day. They also inspected the attic regularly afterward, found and sealed a few small vulnerabilities, and now enjoy a dry, mold-free home.

The Benefits of Professional Help

While DIY methods can be effective, consider that sometimes the best option is to hire professionals for water damage restoration. A trained team has the experience and equipment to handle extensive damage, ensuring the job is done right the first time. They can also help identify hidden issues you may not notice, further protecting your home from future mold growth.

Final Thoughts

Water damage restoration strategies are vital for protecting your home from mold growth. By acting quickly, properly drying affected areas, disinfecting surfaces, and staying vigilant, you can safeguard your environment. Furthermore, implementing preventive measures will further shield your home against water damage in the future.

Remember, prevention is key. Don’t wait for a disaster to strike; make your home a safe haven, free from the perils of mold. Whether you’re a DIY enthusiast or decide to call in experts, proactive water damage restoration strategies will ensure your peace of mind and the health of your household.

Quick Recap of Water Damage Restoration Strategies

  • Act quickly after water damage occurs.
  • Remove standing water immediately.
  • Dry thoroughly to prevent mold.
  • Inspect and repair damage.
  • Clean and disinfect affected areas.
  • Create a mold prevention plan for the future.

By following these steps, you’re well on your way to keeping your home safe and sound. Don’t let mold take root—take action today!

What causes water damage in homes?

Common causes include heavy rain, flooding, burst pipes, and appliance leaks. 770 Water Damage & Restoration offers inspections to identify and address these issues.

How quickly should I respond to water damage?

Act within 24-48 hours to prevent mold growth. Our team at 770 Water Damage & Restoration is available 24/7 for immediate assistance.

What is your restoration process?

We assess damage, remove standing water, dry the area, disinfect surfaces, and make necessary repairs to restore your home.

Can I handle water damage myself?

Minor issues may be manageable, but significant damage requires professionals to avoid further complications. Trust 770 Water Damage & Restoration for expert help.

How can I prevent mold after water damage?

We recommend proper ventilation, regular leak inspections, prompt water damage response, and using mold inhibitors. Our team can assist with these strategies.

A Fresh Perspective on Professional Carpet Cleaning

A Fresh Perspective on Professional Carpet Cleaning

A spotless carpet does more than beautify your living space—it fosters a healthier, cozier environment. While routine vacuuming tackles surface grime, deep-set dirt and allergens demand the expertise of professional carpet cleaners. If you’re planning to hire a service, it’s essential to understand the process, the benefits, and how to prepare for the best results.

Why Expert Carpet Care Transforms Your Living Space

Over time, carpets become silent collectors of dust, pet dander, bacteria, and spills. While at-home cleaning helps, it simply can’t match professional-grade tools and techniques. Here’s why hiring the pros—like those at Green Carpet’s Cleaning—is a smart decision:

  • Superior Deep Clean: Commercial equipment extracts dirt and allergens embedded deep within fibers.
  • Prolongs Carpet Life: Regular cleanings prevent premature wear and tear.
  • Promotes Health: Reduces allergens and contaminants, improving indoor air quality.
  • Hassle-Free: Professionals handle the heavy lifting, saving you time and effort.

Behind the Scenes: The Professional Carpet Cleaning Journey

Curious about what happens once the experts arrive? Let’s walk through the process:

Step 1: Detailed Carpet Assessment

Technicians begin by evaluating the condition of your carpets, identifying problem areas like stains, high-traffic wear, and determining the best cleaning method for the fabric type.

Step 2: Pre-Clean Prep Work

Your cleaning team will:

  • Vacuum to remove loose debris.
  • Pre-treat persistent stains.
  • Shift lightweight furniture when possible.

Step 3: Customized Deep Cleaning Methods

Based on the carpet’s needs, professionals use one or more advanced methods:

  • Steam Cleaning (Hot Water Extraction): Combines hot water and cleaning agents injected into the carpet, then extracted to remove dirt and grime.
  • Dry Cleaning: Minimal moisture and special powders attract dirt for easy removal.
  • Encapsulation: A foam solution crystallizes dirt, which is then vacuumed away.
  • Bonnet Cleaning: A rotating brush scrubs the carpet surface, often used for commercial spaces needing quick drying.

For residents seeking premium carpet care in Malibuthis specialized service ensures your floors look flawless.

Step 4: Final Touches

Once cleaned, your carpet will be rinsed to eliminate residues. Optional protectants may be applied, fibers groomed for a fresh look, and industrial fans used to speed up drying.

How to Prep Your Space for a Smooth Cleaning Day

A little preparation goes a long way:

  • Clear the Area: Remove toys, small furniture, and breakables.
  • Secure Valuables: Store important items safely.
  • Light Vacuum: A quick once-over can help, though it’s not mandatory.
  • Flag Problem Areas: Point out spots needing extra attention.
  • Ensure Access: Make sure pathways to the carpets are clear.

The Long-Term Rewards of Routine Professional Cleaning

Choosing professional cleaning isn’t just about appearances—it’s an investment:

  • Extended Carpet Longevity: Dirt and grit degrade fibers over time.
  • Healthier Home: Removes allergens, dust mites, and pet dander.
  • Odor Removal: Eliminates musty smells, pet odors, and food spills.
  • Enhanced Air Quality: Fewer airborne pollutants mean fresher indoor air.

Looking to elevate your home and also grow your service-based business? World Digital offers expert digital marketing solutions to help local businesses thrive.

How Often Should You Refresh Your Carpets?

Your household’s lifestyle determines the ideal cleaning schedule:

Household SituationRecommended Frequency
Pets & ChildrenEvery 3–6 months
High Foot Traffic AreasEvery 6 months
Allergy-Prone FamiliesEvery 4–6 months
Standard MaintenanceOnce a year

Setting the Record Straight: Carpet Cleaning Myths Debunked

  • Myth: Carpets stay wet for days. Truth: Modern methods ensure drying within 6–12 hours.
  • Myth: Cleaning causes shrinkage. Truth: Professionals control moisture to protect carpet integrity.
  • Myth: DIY tools work just as well. Truth: Home machines can’t match commercial-grade cleaning power and efficiency.

Quick Answers to Common Questions

How long does a professional cleaning session last? Generally, 1–2 hours, with drying completed in under 12 hours.

Can pros eliminate pet odors and stains? Yes! Specialized treatments target and neutralize even stubborn pet messes.

Is there a risk of damaging the carpet? Not with experienced professionals using safe, fabric-appropriate techniques.

Are the cleaning solutions child- and pet-safe? Most modern services use eco-friendly, non-toxic products.

How can I maintain clean carpets between professional visits?

  • Vacuum twice weekly.
  • Blot spills immediately.
  • Use area rugs in busy zones.
  • Encourage a no-shoes policy indoors.

Wrapping Up: Why Professional Carpet Cleaning Matters

Professional carpet cleaning breathes new life into your flooring while protecting your health and investment. By scheduling regular cleanings, preparing your home, and adopting good maintenance habits, you’ll enjoy beautiful, long-lasting carpets for years to come.

Water Damage Restoration: Mold Risks and Prevention Tips

Imagine this: A strong storm blows through your neighborhood, heavy rain flooding your basement and soaking your carpets. You call in a water damage restoration company, but what you might not realize is the unseen threat lurking in the shadows: mold. In this article, we’ll explore mold risks and prevention tips, ensuring you’re equipped to protect your home from both water damage and mold growth.

Water damage is often more than just a nuisance; if not addressed properly, it can lead to mold growth, which poses health risks and damages your property. Awareness of mold risks during the restoration process is crucial for any homeowner, DIY enthusiast, or even industry professional.

Understanding the Mold Risks

Mold is a type of fungus that thrives in moist, humid environments. It reproduces through spores that can easily become airborne, causing allergic reactions and other health issues when inhaled. When water damage occurs, it’s essential to act quickly because mold can start to grow within 24 to 48 hours. Understanding these mold risks gives you the upper hand in preventing problems down the line.

For instance, let’s take the story of Sarah, a homeowner who experienced significant flooding after a pipe burst. After the water was removed, Sarah thought everything was fine. Weeks later, however, she began to notice a musty smell in her home. By the time she called a professional, mold had already taken hold behind her drywall, leading to costly repairs and health concerns.

Prevention: The Key to Keeping Mold at Bay

Now that we know the risks, let’s focus on preventing mold during the water damage restoration process. Remember, early intervention is your best defense. Here are some practical tips to ensure your home remains mold-free:

  1. Immediate Action: At the first sign of water damage, take action. Remove excess water using pumps and wet/dry vacuums. The quicker you act, the less chance mold has to establish itself.
  2. Dry Everything Thoroughly: Use fans and dehumidifiers to dry out the affected areas completely. Open windows and doors when possible to enhance ventilation. If you’re dealing with carpets, consider removing and drying them in the sun.
  3. Inspect for Hidden Moisture: Mold can grow in hidden areas like under floorboards or behind walls. Consider using a moisture meter to check for hidden dampness.
  4. Clean and Disinfect: Once the area is dry, clean and disinfect surfaces with a mixture of water and vinegar or specialized mold-cleaning products. While bleach is often used, it may not penetrate porous materials as deeply and can sometimes lead to further issues.
  5. Seal and Protect: Once your home is dry and clean, consider applying mold-resistant products. Sealant and paints can help provide extra protection against moisture.

When to Call a Professional

Sometimes, the situation may be more than you can handle. If you notice signs of mold, such as discoloration, an increase in allergies, or a persistent musty smell, it’s essential to call a professional. They have the tools and expertise to identify and remediate mold properly.

Common Misconceptions About Mold

Although many homeowners are aware of mold risks, there are still misconceptions that can lead to misunderstandings about mold prevention:

  • Not Just a Problem in Basements: While basements are more prone to mold, it can grow in any area where moisture collects. Bathrooms, kitchens, and attics can also be hot spots.
  • You Can’t Always See It: Mold can be hidden behind walls or under carpets. Just because you can’t see it doesn’t mean it’s not there. Regular inspections are key.
  • DIY Repairs May Not Be Enough: For significant water damage, merely drying out the space may not suffice. Professional remediation can ensure that mold does not come back.

Signs of Mold Growth: What to Watch For

Being proactive means knowing what to look for. Here are some signs that mold may be lurking in your home:

  • Musty Odors: A persistent musty smell can indicate mold presence, even if you can’t see it.
  • Visible Mold Spots: Discoloration on walls, ceilings, or floors suggests mold issues.
  • Increased Allergy Symptoms: If you notice an uptick in sneezing, coughing, or other allergy-related symptoms, it may be linked to mold.

A Quick Guide to Mold Prevention

To sum it up, here’s a handy checklist for mold prevention during water damage restoration:

  • Remove excess water immediately.
  • Ensure areas are dried thoroughly.
  • Inspect hidden spaces for moisture.
  • Clean and disinfect as needed.
  • Consider professional help when required.

Final Thoughts

In the end, whether you’re dealing with stubborn leaks, minor floods, or seasonal rains, stay ahead of potential problems. At 770 Water Damage & Restoration, we’re here to help you navigate these challenges, ensuring your home remains a safe and welcoming space. Remember, preventing mold is not just about cleaning up after the mess; it’s about taking ownership of your living environment. Keep your eyes open, your tools handy, and your knowledge up to date, and you’ll be equipped to handle whatever comes your way.

Take Action Today

Whether you’re currently facing water damage or simply want to prepare for the future, take action today! Keep this guide in mind, share it with others, and most importantly, take pride in maintaining your home’s integrity. Together, we can keep mold at bay and make every space a healthier, happier environment.

What should I do first if I have water damage?

Ensure your safety by turning off electricity in the affected area and contact 770 Water Damage & Restoration immediately for emergency services.

How can I tell if there’s mold in my home?

Look for a musty smell, discoloration on surfaces, or visible mold spots. If you suspect mold, call 770 Water Damage & Restoration for an inspection and remediation.

How quickly can mold grow after water damage?

Mold can grow within 24 to 48 hours after water damage. Prompt action is essential; contact 770 Water Damage & Restoration right away to minimize risks.

How can I prevent mold after restoration?

Thoroughly dry and clean affected areas using dehumidifiers and fans. 770 Water Damage & Restoration provides effective drying and treatment to prevent mold growth.

When should I hire professionals for water damage?

Hire professionals if the damage is extensive, mold is present, or you feel overwhelmed. 770 Water Damage & Restoration has the expertise to restore your home safely.

Effective Water Damage Restoration for Dripping Wall Problems

Water damage can be a homeowner’s worst nightmare, especially when it manifests as dripping walls. Not only can these issues damage your home, but they can also lead to mold growth and other complications if left untreated. Today, we’ll embark on a journey through water damage restoration, specifically addressing dripping wall problems and how to effectively resolve them.

Imagine this: you arrive home after a long day at work, looking forward to a peaceful evening, only to discover water stains running down your living room wall. Panic sets in as you wonder how long this has been happening and what it will take to fix it. This scenario is all too common, and knowing what steps to take can make a world of difference.

Understanding Dripping Wall Problems


Dripping wall problems occur due to excess moisture intrusion, which can be caused by various factors. Faulty plumbing, heavy rainfall, or even condensation can lead to water seeping into your walls. When this happens, it creates an environment ripe for issues like mold growth and structural damage, not to mention the inconvenience and stress it causes.

When confronting dripping wall problems, it’s crucial to identify the source of the water. For instance, a leaky roof might cause water to pool in your walls, or a burst pipe could lead to a waterfall of moisture invading your home. Understanding the culprit can streamline the restoration process.

Steps for Effective Water Damage Restoration


Now, let’s dive into the steps for effective water damage restoration, especially when it involves those pesky dripping walls. Follow these guidelines to tackle the issue like a pro:

Assess the Damage:

Start by inspecting the affected area. Look for signs of water damage, such as discoloration, bubbling paint, or mold. Document your findings with photos, which may be helpful if you file an insurance claim.

Identify the Source:

Is the problem caused by a leak, pipe burst, or roof issue? Inspect all potential sources. If it’s beyond your capabilities, don’t hesitate to call a professional. They have tools like moisture meters to locate hidden leaks.

Stop the Water Flow:

Once you’ve identified the source, the next step is to stop more water from entering your walls. This may involve shutting off the water supply or calling a plumber for repairs.

Remove Damaged Materials:

Remove any soaked drywall, insulation, or other materials that have been compromised. This step is essential to prevent the growth of mold and bacteria.

Dry the Area:

Use fans, dehumidifiers, and open windows to promote airflow and speed up the drying process. Ensuring that the area is completely dry is critical to prevent further issues.

Clean and Disinfect:

After everything is dry, clean the surfaces using a disinfectant to eliminate any potential mold spores. Products with anti-microbial properties can help enhance safety.

Repair and Restore:

Once the area is dry and cleaned, it’s time to repair the damage. This may involve replacing drywall, repainting, or even remodeling the affected space.

Common Customer Concerns


When dealing with dripping wall problems, homeowners often have specific questions. Let’s address a few common concerns surrounding water damage restoration.

How Much Will It Cost?

The cost of water damage restoration varies significantly based on the extent of the damage and the materials needed for repairs. For minor issues, homeowners might spend a few hundred dollars, while significant restorations could run into the thousands. It’s best to get multiple quotes from certified professionals.

Will My Insurance Cover the Damage?

Insurance can be tricky. It often depends on the cause of the water damage. For example, if it was caused by a sudden event like a pipe burst, it’s more likely to be covered. However, gradual water damage from long-term leaks may not be. Always check your policy and consult your insurance agent.

How Long Will Restoration Take?

The timeline for restoration can range from a day to several weeks. Factors like the extent of the damage, the drying time, and the repairs needed all play a role. An experienced restoration company can provide a more accurate estimate.

DIY vs. Professional Help


Deciding between a DIY approach and hiring a professional can sometimes be difficult. Here are some factors to consider:

DIY Approach:

Ideal for minor issues that can be managed with simple tools.
Helps save money on labor costs.
Involves a learning experience, which can be empowering.


Professional Help:

Best for extensive water damage that requires advanced tools and expertise.
Professionals can complete work faster and more efficiently.
Ensures all safety protocols are followed.
If you’re ever unsure, it’s wise to consult with a professional to evaluate the situation thoroughly.

Helpful Tips to Prevent Future Water Damage


Once you have resolved your dripping wall problems, it’s essential to adopt preventative measures to safeguard your home from future incidents. Consider implementing the following tips:

Regular Inspections:

Make it a habit to check your home regularly for signs of leaks or moisture. Pay close attention to areas around windows, doors, and pipes.


Maintain Your Roof:

Keep your roof in good condition by cleaning gutters and removing debris. Ensure that shingles are not missing or damaged and have a professional inspect your roof annually.


Upgrade Plumbing:

If your home has older plumbing, consider upgrading it. Modern piping materials are less prone to leaks and breaks, reducing your risk of water damage.


Seal Cracks and Gaps:

Check the exterior of your house for cracks and gaps, especially around windows and doors, and repair them promptly. This will help prevent unwanted water intrusion.


Install Proper Drainage:

Ensure that your yard is graded away from your home’s foundation. Consider installing downspouts and a drainage system to divert excess water away from your walls.


Real-World Example: A Homeowner’s Journey


Let’s take a look at a real-world scenario to illustrate the water damage restoration process. Meet Emma, a homeowner who experienced dripping wall problems after heavy rainfall.

Emma noticed damp spots on her living room wall one Friday evening. Concerned, she checked around the windows and under the sink but found nothing obvious. After some detective work, she discovered that the heavy rain had caused water to seep through a crack in her foundation.

Determined to restore her home, Emma followed the steps outlined above. She first stopped the water flow by diverting gutters, then removed the damaged drywall and insulation. Once everything was dry, she disinfected the area and repaired the walls.

Not only did she solve her immediate problem, but Emma also took the opportunity to reinforce her foundation and improved the drainage around her home. Her proactive steps ensured that her living room remained dry even through heavy storms.

Take Control of Water Damage


Dripping wall problems can be overwhelming, but with the right information and approach, homeowners can tackle these issues head-on. Whether through a DIY effort or by enlisting the help of professionals, understanding the process of water damage restoration can empower you to protect your home effectively.

At 770 Water Damage & Restoration, we are committed to assisting you with your water damage issues. Our team of experts is ready to provide swift and thorough water damage restoration services, making your home safe and dry once again. Remember, taking quick action when you spot the signs can save you time and money in the long run.

Stay alert, keep your space dry, and don’t hesitate to reach out for help if you’re facing challenges with dripping walls or other water damage concerns. Together, we can ensure your home remains a safe haven for you and your family.

Understanding the Global Water Crisis

Water is life, yet millions around the globe face immense challenges in accessing safe and clean water. The escalating impacts of climate change, along with natural disasters like floods, droughts, and storms, are increasingly threatening public health and sustainable development—exemplifying the ongoing Global Water Crisis.

In Westlake Village, water damage restoration is essential for protecting homes and businesses from the devastating effects of water-related disasters, such as floods, leaks, and storms. Companies like 770 Water Damage & Restoration specialize in providing timely and effective services to address these emergencies. Their experienced professionals assess the extent of water damage, implement extraction processes, and carry out thorough drying and dehumidification to prevent mold growth and structural damage. With a commitment to restoring properties to their pre-damage condition, these services not only ensure safety but also help maintain the value of your investment. Residents of Westlake Village can trust in dedicated restoration efforts to combat the repercussions of water damage and secure their living and working environments.

The Influence of Climate Change on Water Resources

Altered Weather Patterns
Climate change is reshaping our water systems by disrupting weather patterns and exacerbating water scarcity. Regions that once enjoyed stable water supplies are now grappling with erratic rainfall and prolonged dry spells. These shifts pose serious health risks, particularly for children, who are especially vulnerable to waterborne diseases in these unpredictable environments.

The Rising Threat of Contaminated Water
Natural disasters not only compromise the availability of water but also its quality. Catastrophic events can lead to widespread contamination, resulting in deadly outbreaks of illnesses like cholera and typhoid. This is particularly concerning for children, whose health can be severely impacted by unsafe drinking water.

The Alarming Statistics of Water Scarcity

Between 2001 and 2018, droughts and floods accounted for nearly 74% of all natural disasters, with forecasts predicting an increase in both their frequency and intensity.
Approximately 450 million children now reside in regions at high risk for water vulnerability, limiting their ability to meet basic needs.
Contaminated water is a leading cause of child mortality; hundreds of thousands of young lives are lost each year from waterborne diseases—over 700 children under five die daily due to the Global Water Crisis.
The Socioeconomic Implications of Water Scarcity


Rising Conflicts Over Resources
As water becomes increasingly scarce, competition for this vital resource intensifies. This can lead to tensions and even violent confrontations, highlighting the urgent need for comprehensive solutions to the Global Water Crisis.

Future Warnings: Water Stress by 2040
By 2040, it is estimated that one in four children worldwide will live in regions experiencing severe water stress, continuing the cycle of crisis and jeopardizing their futures.

Environmental Challenges
Rising sea levels further threaten freshwater supplies by inundating them with saltwater, making safe drinking water inaccessible for countless communities.

Immediate Steps Toward a Sustainable Solution
The impacts of climate change on water resources are becoming increasingly evident, necessitating swift action. Enhancing water efficiency, investing in sustainable infrastructure, and transitioning to solar-powered solutions are all pivotal steps to safeguard future generations and combat the Global Water Crisis.

How 770 Water Damage & Restoration Can Support You
In the midst of these pressing global issues, local services, like 770 Water Damage & Restoration, play a crucial role by addressing the immediate consequences of water damage caused by floods, leaks, and other disasters. Their expert services ensure that both homes and businesses remain safe and secure. If you experience water damage or suspect a leak, reach out to them for professional assistance designed to restore your property effectively.

FAQs About Water Damage Restoration

What are the common causes of water damage in Westlake Village?

Common causes include heavy rainfall, flooding, burst pipes, roof leaks, and appliance malfunctions. Addressing these issues promptly is crucial to prevent further damage.

How can I recognize if my property has water damage?

Look for signs such as water stains on ceilings or walls, mold growth, musty odors, and elevated humidity levels. If you suspect water damage, it’s wise to contact a restoration professional for an assessment.

What steps are involved in the water damage restoration process?

The process typically includes inspection and assessment, water extraction, drying and dehumidification, cleaning and sanitizing, and final restoration and repairs.

How long does the water damage restoration process take?

The duration can vary based on the extent of damage—minor issues may take a few days, while severe cases could require weeks for complete restoration.

Can water damage lead to health issues?

Yes, water damage can create various health risks, particularly if mold develops or if the water is contaminated. It’s essential to address water damage promptly for your health and safety.

The Silent Menace: Unmasking Hidden Water Leaks in Your Home

Picture this: You’re cozily settled in your living room, blissfully unaware of the hidden water leaks lurking behind your walls. Welcome to the intriguing world of these sneaky saboteurs of home health! Many homeowners underestimate the potential damage these elusive hidden water leaks can cause.

Did you know that the average household loses around 10,000 gallons of water annually due to leaks? That’s enough to fill a backyard swimming pool! But fear not, dear homeowner. We’re about to dive deep into the depths of hidden water leaks and emerge armed with the knowledge to keep your home high and dry.

The Secret Life of Hidden Water Leaks: More Than Just a Drip

Yes, we’ve all battled a dripping faucet or dealt with a weeping water heater. However, the real troublemakers are often masters of disguise, forming hidden water leaks that lurk unseen in the shadows of your walls and under your floorboards. Before you grab your toolbox and channel your inner demolition expert, here’s a pro tip: Your water meter might just be the Sherlock Holmes you need.

Find that little colored leak indicator located next to the meter hand. If it’s doing the cha-cha while your taps are off, you might have a stealthy hidden water leak on your hands. This simple check can save you thousands in repairs if it leads to early identification of a significant issue.

The Sinister Eight: Common Culprits of Hidden Water Leaks

Understanding the typical sources of hidden water leaks can help you identify potential issues in your home. Here’s our list of the “Sinister Eight” culprits:

  1. Seal Team Cracks: Those tiny seals around your appliances are not just for show. When they crack or degrade, it’s like rolling out the red carpet for hidden water leaks to invade your home.
  2. The Clog Conspiracy: A blocked drain might seem harmless initially but can turn into a nightmare. Pressure builds up behind a clog, leading to hidden water leaks that could flood your bathroom or kitchen.
  3. Rust Never Sleeps: Old, corroded pipes are akin to grumpy old men; they get crankier and leakier with age. Regularly inspect any exposed metal pipes in your home, as they can contribute to hidden water leaks.
  4. Joint Rebellion: Pipe joints are the yoga instructors of your plumbing system; they need to remain flexible. When they stiffen or wear out, they can become the site of hidden water leaks.
  5. Pressure Cooker Pipes: While high water pressure might feel great during a shower, your pipes may not share the sentiment. Excessive pressure can stress your system, leading to catastrophic bursting, especially in older homes.
  6. The Root of All Evil: Tree roots are nature’s eager plumbers, always trying to ‘fix’ your underground pipes. Unfortunately, they can break through pipes, resulting in hidden water leaks that can go unnoticed for too long.
  7. Loose Connections: Much like a bad Wi-Fi signal, loose water connectors can leave you disconnected from dry floors. Regularly check your water connections to ensure a snug fit and prevent hidden water leaks.
  8. Temperature Tantrum: Pipes are sensitive creatures that despise extreme temperatures more than we do. Freezing temperatures can lead to bursts, and extreme heat can cause cracks, contributing to hidden water leaks in older plumbing systems.

Don’t Let Hidden Water Leaks Dampen Your Spirit!

Have you noticed an unexplained spike in your water bill? Are you catching whiffs of eau de mildew? It might be time to call in the cavalry. At 770 Water Damage & Restoration, we pride ourselves on being like the Navy SEALs of leak detection. Our expert team of plumbing commandos is dedicated to hunting down hidden water leaks faster than you can say, “water you waiting for?”

Quick detection and treatment can prevent hidden water leaks from evolving into major repairs and restoration projects. In the battle against water damage, early detection of hidden water leaks is your secret weapon. Do not let a minor leak escalate into a big problem.

Protect Your Castle!

So, what can you do? Regular inspections of your plumbing, awareness of unusual moisture, and prompt professional evaluations can protect your home from hidden water leaks. Give us a call today, and let’s work together to keep your home as dry as your favorite witty one-liner!

Remember, when it comes to hidden water leaks, what you can’t see CAN hurt you. Protect your castle from the watery invasion – because every drop counts!

 Stain-Free & Spotless: Your Ultimate Carpet Maintenance Plan

Your carpets do more than just decorate your home—they trap dust, absorb sound, and add comfort underfoot. However, without regular care, carpets can quickly lose their charm. This all-in-one guide offers expert strategies and easy routines to maintain spotless, fresh carpets throughout the year.


🌀 Daily Defense: The Importance of Routine Vacuuming

Vacuuming is your first and strongest line of defense. It lifts dirt before it becomes embedded, preserves carpet fibers, and reduces allergens in your home.

📅 How Often Should You Vacuum?

  • Busy areas (hallways, living rooms): At least twice a week
  • Low-traffic rooms (guest rooms)Once a week
  • With petsThree to four times weekly
  • For allergy sufferersDaily vacuuming is ideal

✅ Vacuuming Techniques That Work

  • Use a HEPA filter vacuum for maximum dust and allergen capture.
  • Move at a slow, steady pace to remove deeply lodged dirt.
  • Set your vacuum to the correct carpet height.
  • Empty the dust bin or change the bag frequently.

🩸 Spot Smarts: Fast & Effective Stain Removal

Spills are bound to happen. What matters most is how quickly and how well you treat them.

✔️ Do This

  • Blot immediately with a clean towel—never rub.
  • Rinse the area with cold water before applying any cleaner.
  • Always test cleaners on an inconspicuous area first.
  • Use mild dish soap for most everyday stains.

❌ Avoid This

  • Don’t scrub, as this can spread or deepen stains.
  • Don’t use hot water on protein-based stains (e.g., blood, milk).
  • Avoid over-wetting the carpet, which can lead to mildew.

💡 Targeted Stain Solutions

  • Red wine: Club soda or a hydrogen peroxide + dish soap mix
  • Coffee: White vinegar, water, and a drop of mild detergent
  • Pet accidents: Enzyme-based cleaners to neutralize odors and bacteria

🧼 Deep Clean Like a Pro: Why & How to Refresh Thoroughly

Vacuuming and spot cleaning can only go so far. Periodic deep cleaning removes ground-in grime and restores freshness.

🧯 Professional Deep Cleaning

  • Recommended every 12–18 months
  • Uses hot water extraction for a thorough cleanse
  • Ideal for heavily used or stained areas

🛠️ DIY Deep Cleaning

  • Rent or buy a carpet cleaner for cost savings
  • Use only the appropriate shampoo for your carpet type
  • Allow carpets to dry completely to prevent mold growth

🚪 Dirt Defense: Prevention Tips for a Cleaner Home

Preventing dirt from entering your home can make carpet care dramatically easier.

🧩 Smart Habits for Less Mess

  • Place doormats at all entrances
  • Encourage a no-shoes rule indoors
  • Rotate furniture to even out wear patterns
  • Use rugs or runners in high-traffic zones

🐾 Pet-Proof Carpets: Stay Ahead of Fur and Odors

Pets are part of the family, but they do bring fur, smells, and the occasional mess. Here’s how to keep things under control.

🐶 Carpet Care for Pet Owners

  • Brush and bathe pets regularly to minimize shedding
  • Use a vacuum with strong suction and pet-specific attachments
  • Sprinkle baking soda before vacuuming to neutralize odors
  • Clean accidents immediately with enzyme cleaners

🗓️ Carpet Care Calendar: What to Do & When

Stay consistent with this easy maintenance timeline:

🧍‍♂️ Daily

  • Spot clean any spills
  • Quick vacuum in frequently used areas

📅 Weekly

  • Full vacuum throughout your home
  • Inspect and treat any new stains

🗓️ Monthly

  • Rotate rugs to reduce uneven wear
  • Use attachments to deep vacuum corners and edges

📆 Annually

  • Schedule professional deep cleaning
  • Apply a carpet maintenance to shield fibers from future stains

❓ Top Carpet Maintenance FAQs

🟢 How do I extend my carpet’s life? Vacuum regularly, address stains promptly, deep clean annually, and reduce sun exposure to prevent fading.

🟡 What works best for tough, set-in stains? Try a solution of hydrogen peroxide and dish soap, let it sit for 10–15 minutes, then blot gently.

🔵 Can I steam clean carpets at home? Yes! Rent or buy a steamer, but always ensure the carpet is fully dry afterward to avoid mildew.

🟤 How do I get rid of musty odors? Sprinkle baking soda, leave it for 15–30 minutes, and vacuum it up. Repeat as needed.

⚪ Is it worth hiring professionals? Definitely—industrial equipment reaches deeper than home tools and revitalizes worn carpet fibers.


A Cleaner Home Starts from the Ground Up

Consistent carpet maintenance goes beyond looks—it promotes better air quality, extends carpet lifespan, and creates a more inviting home. By following these digital expert-backed tips, your carpets will stay soft, spotless, and fresh year-round.

5 Essential Steps to Repair Water Damage

Water damage might be a homeowner’s worst fear. When water penetrates drywall, it may produce stains, decrease structural integrity, and even lead to collapse. Homeowners are often left wondering what steps to take next. Fortunately, with the appropriate methods and knowledge, you can effectively repair and restore the damage to your house. Understanding the nuances of water damage repair can help prevent further issues and maintain the value of your property. In this guide, we will explore five essential steps, along with tips and examples, to help you manage water damage effectively.

Lastly, consider documenting the repair process with photos and notes. This record not only assists in understanding the repairs made but can also be invaluable if you need to file an insurance claim in the future. By keeping a detailed log, you’ll have a better grasp of the history of your home’s maintenance and repairs, contributing to its overall value and your peace of mind.

Moreover, it’s wise to review your homeowner’s insurance policy to understand what is covered regarding water damage. Some policies may cover repairs and restoration while others may not, especially if the damage was due to neglect or lack of maintenance. Knowing your coverage can save you from unexpected expenses. Regular maintenance checks on plumbing and roofs can also help mitigate potential water damage issues before they escalate.

Understanding water damage and its effects on your home is crucial. For instance, water can lead to mold growth, which poses health risks to your family. As such, it’s important to act quickly when you suspect water damage. Utilizing a dehumidifier can help reduce moisture in the air, further preventing mold buildup. Additionally, keeping your home well-ventilated can also assist in drying out damp areas. Implementing these preventive measures can protect your home in the long run.

Step 1: Identify the Source of Water Leakage

Before you can repair the drywall, you must first locate and turn off the water supply. This is critical to prevent any additional water from causing more damage. Start by looking for moist patches, leaking water, and drooping ceilings, which can indicate the presence of water damage. If the drywall bulges or crumbles, the water damage is extensive and requires immediate attention. It is beneficial to inspect areas where plumbing is present, such as kitchens and bathrooms, as these are common sources of leaks. Fixing the leak first protects against future damage and guarantees that the repair lasts, saving you time and money in the long run.

Step 2: Remove Water-Damaged Drywall

Begin by placing down drop cloths or tarps to collect debris and reduce mess. This not only protects your flooring but also makes cleanup easier. Determine the degree of the damage: if the drywall is soft, cracking, or sagging, it must be removed. Carefully inspect the area to see if there are additional hidden damages. To chop away damaged pieces, use a utility knife or a hammer’s claw, ensuring you cut beyond the damaged area to ensure a clean patch. If only small stains are present, drying and repainting may suffice, but be aware that underlying issues may require more attention.

Step 3: Replace and Patch the Drywall

Measure the damaged area accurately and cut a replacement drywall piece that is two inches larger than the hole for a proper fit. On the back of the new drywall, measure 1 inch from each side and score the paper backing without cutting through it. This technique allows you to create a tapered edge, which will help blend the new piece with the existing wall. Use drywall screws to secure the new piece in place, ensuring it is tightly fitted. Fill any gaps with joint compound, using a putty knife to smooth the surface. Allow the compound to fully dry before sanding it down to a smooth finish, which will prepare the surface for painting.

Step 4: Prime and Paint

After the joint compound has dried and been sanded flat, apply primer to the mended area. This step is crucial as it helps the new paint adhere better and provides a uniform finish. Use gentle, even strokes with a roller to produce a perfect blend with the surrounding wall. Choose a primer that matches the type of paint you will use. After priming, apply at least two coats of paint, allowing each layer to fully dry before applying the next. This not only ensures that the repair is aesthetically pleasing but also protects the wall from future moisture damage.

Step 5: Clean Up

Use a shop vacuum to eliminate dust and debris created during the repair process. This includes drywall scraps and leftover paint containers, which should be disposed of properly to avoid environmental hazards. Make sure to wash brushes, rollers, and other instruments with warm, soapy water immediately after use to prolong their lifespan. When removing the painter’s tape, do so at a 45-degree angle to avoid pulling away any new paint. Finally, appropriately store your tools for later use, and consider keeping a list of what was done for future reference.

Call the Experts for Professional Assistance

If you find persistent leaks or substantial wall damage, expert assistance may be required. Trying to handle extensive repairs without the proper experience can lead to more issues. Seek help from professionals who specialize in water damage repair and restoration. For example, 770 Water Damage & Restoration has specialists trained in identifying and fixing leaks, including those concealed under walls and floors. They can provide a thorough inspection and offer solutions tailored to your specific situation. Contact us now to have your house restored fast and effectively, ensuring peace of mind for you and your family!

Unleash Clean Water Delight: Best Whole Home Water Filter Systems

Understanding Whole Home Water Filter Systems

Thinking about giving your water situation at home a boost? Let’s chat about whole home water filter systems, so you’re always sipping and showering with the good stuff.

Benefits of Installing a Whole Home Water Filter System

Choosing a whole home water filter system means you’re stepping up your water game for your entire house. Let’s break down the perks:

  • Bye-bye Impurities: These systems are like bouncers for your pipes, kicking out stuff like sediment, chlorine, funny chemicals, and heavy metals from your water.
  • Tastes and Smells Better: Filtering unwanted bits makes your water taste and smell like it should—clean and refreshing.
  • Health Watchdog: Get clean water at every tap, cutting down those pesky waterborne nasties that you definitely don’t want hanging around.

How Whole Home Water Filter Systems Work

These bad boys take action at your main water entry, filtering everything before it flows out of any tap or showerhead. It’s a bit like sending your water through a health spa. Here’s a peek into how they handle the business: Open Link

Stage of FiltrationWhat It Does
1. Sediment CleanupCleans the big stuff out, like dirt, sand, and rust.
2. Carbon PowerGets the chlorine, organic bits, and some pesky chemicals out, upping the taste game.
3. Reverse Osmosis MagicChucks out dissolved solids and heavy metals through a snazzy membrane.
4. UV ZappingZaps and wipes out the creepy crawlies, including bacteria and viruses, with ultraviolet light.

With these pros working together, your whole home gets a steady stream of clean, filtered water ready for chugging, cooking, bathing, or even that laundry pile.

Knowing how these systems work and what they can do for you puts you in the driver’s seat when picking what fits your city water quality needs best.

Choosing the Best System for Your Home

So, you’re on the hunt for the ultimate whole house water filter? Good call. Figuring out the right one for you requires keeping a few big things in mind. And yep, the setup process and routine care are part of the deal if you want this baby to keep working like a charm.

https://www.softprowatersystems.com/pages/unleash-clean-water-essential-well-water-iron-removal-solutions

Factors to Consider When Selecting a Whole Home Water Filter System

Before you dive into the deep end with your wallet, make sure you know what you’re dealing with:

Thing to Think AboutWhy It Matters
Water QualityWhat’d your city water taste like? You need to know what gremlins (or contaminants) you’re up against.
Filtration StyleNot all filters are created equal. Make sure it kicks out the nasty stuff like sediment, chlorine, and those sneaky heavy metals.
Flow RateDon’t trade your water pressure for peace of mind. Make sure the system can keep up with your household thirst.
Filter LifespanFilters have a shelf life—know how long they last and what it costs to swap ’em out.
CertificationKeep an eye out for stamps of approval from the stalwarts – NSF or WQA. It’s your guarantee of performance.
BudgetBefore you break the bank, get a handle on initial buy and long-term maintenance costs.

Sizing up these factors gives you a chance to pick a filtration system that ticks all your boxes.

Installation and Maintenance Considerations

Got the system that fits your needs? Nice. Next up: making sure it gets in without a hitch and stays in shape.

What to Think AboutWhy It’s Important
InstallationIf DIY plumbing isn’t your thing, call in a pro. Better safe than soaked.
Space NeedsMake sure your home’s got room for everything – pre-filters, post-filters, and them main units.
Maintenance To-DosSet a date in your calendar – think filter swaps, a bit of cleaning, and the occasional check-up.
Filter Swap Know-howGet the 411 on changing filters—what you need, where to get ’em, and how to slot them in.
WarrantyDouble-check what protections the manufacturer offers in case things go sideways.

Getting a grip on setup and upkeep will keep that clean water flowing easy-peasy. Cheers to your fresh, filtered future!

-